Quick start
After this page, you will create a new project with bolt init and run your first pipeline end to end. You will also know when to use each built-in preset.
This guide follows the real bolt-pipeliner==0.2.6 CLI behavior.
1. Start from an empty folder
Create a working directory and initialize a new project:
mkdir quickstart-work
cd quickstart-work
bolt init my_first_pipeline
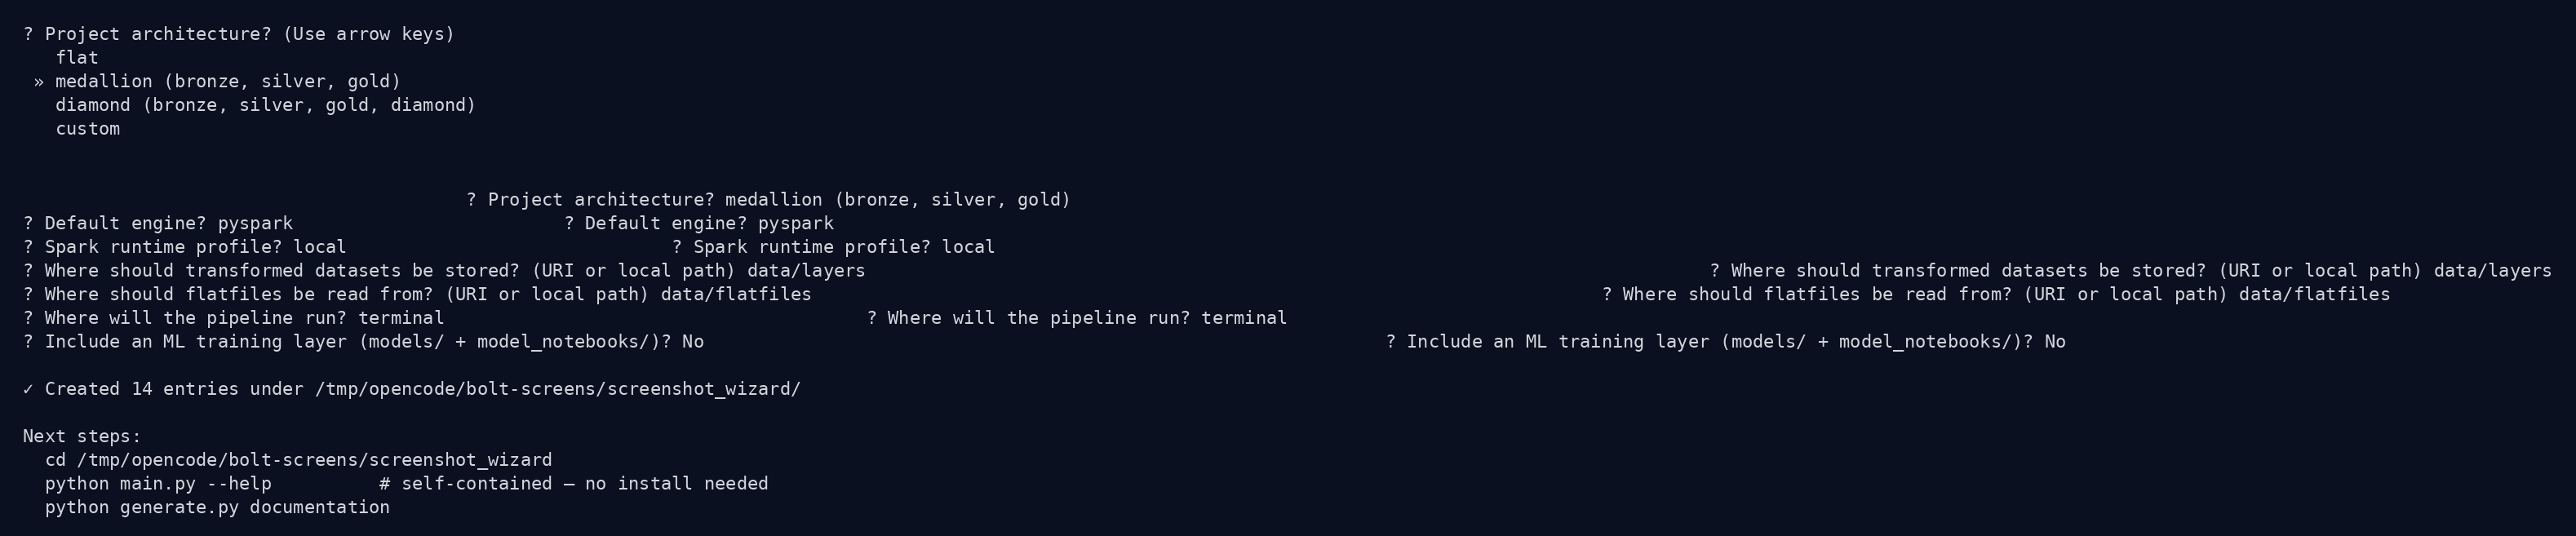
By default, bolt init starts an interactive wizard.
2. Answer the wizard questions
The wizard asks these questions in order:
Project architecture?Default engine?Spark runtime profile?(only when engine ispyspark)Where should transformed datasets be stored? (URI or local path)Where should flatfiles be read from? (URI or local path)Where will the pipeline run?Include an ML training layer (models/ + model_notebooks/)?Add a diamond layer to host ML jobs?(only when ML is enabled and diamond is not already selected)
If you accept defaults, you get a medallion style project using pyspark with a local Spark profile.
3. Use a preset when you want speed
Presets skip the questions and scaffold a known shape:
minimal: layersflatfile, bronze, enginepandas, terminal executionmedallion: layersflatfile, bronze, silver, gold, enginepyspark, terminal executiondiamond: layersflatfile, bronze, silver, gold, diamond, enginepyspark, airflow execution, ML enabledpandas: layersflatfile, bronze, silver, gold, enginepandas, notebook executionpolars: layersflatfile, bronze, silver, gold, enginepolars, notebook execution
Example preset command:
bolt init my_first_pipeline --preset pandas4. Add one input file and run
Move into your project, create the sample CSV expected by the scaffold, then run:
cd my_first_pipeline
mkdir -p data/flatfiles
cat > data/flatfiles/example.csv <<'CSV'
id,value
1,alpha
2,beta
CSV

bolt run --verbose
The first run loads example.csv, writes the output table for the flatfile layer, and prints verbose stage logs.
5. What to do next
Now you can replace the scaffolded module with your own logic and add jobs to configs/etl_config.yaml.